Fortunately Microsoft Word 2010 has some basic image editing capabilities, including an option for you to add a border around a picture. You will have control over the color, thickness and style of the border, allowing for an impressive amount of potential styling options. Our tutorial below will show you how to place a border around an image that has been inserted into your Word document.
Add a Border Around a Picture in Microsoft Word 2010
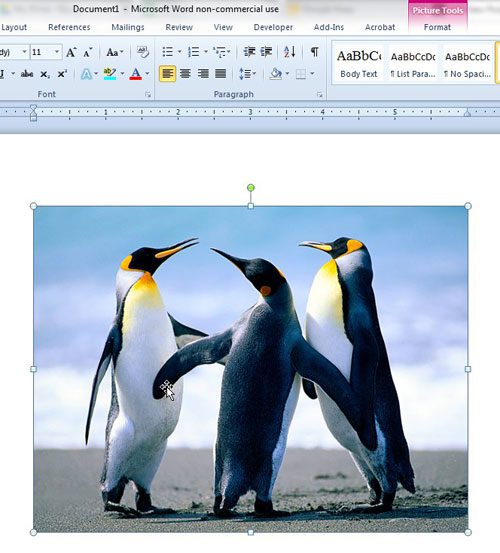
The steps in this guide will show you how to add a border around a picture that is in your Word 2010 document. Step 1: Open the document containing the picture to which you want to add a border. Step 2: Click the picture once to select it.
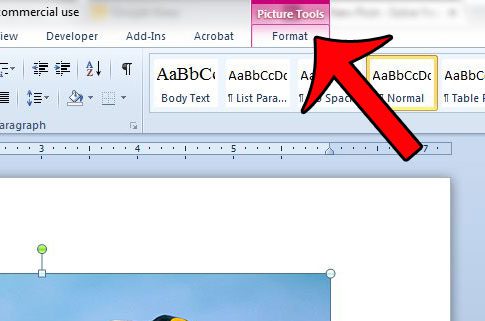
Step 2: Click the Format tab under Picture Tools at the top of the window.
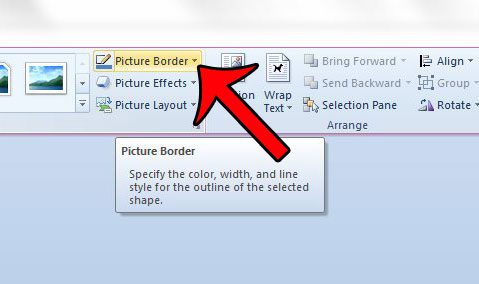
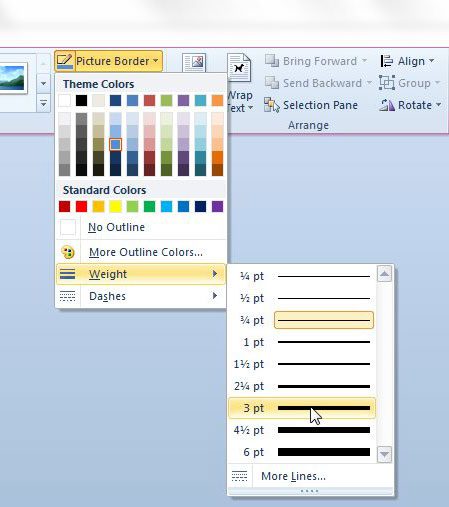
Step 3: Click the Picture Border button in the Picture Style section of the navigational ribbon.
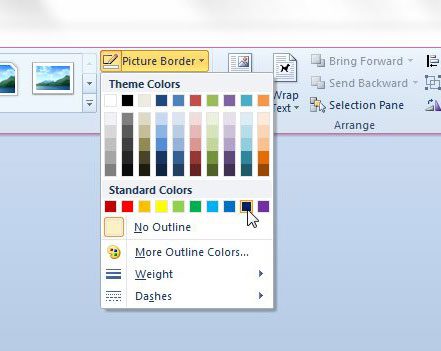
Step 4: Select the border color from the options in this menu. If you do not see the color that you want, you can click the More Outline Colors option for a larger selection.
If you want to make the border thicker or thinner, click the Weight option, then select the desired border width. You can also elect to use a dashed border by clicking the Dashes option.
If you want to add text to a picture that you have inserted into your document, then you can do so directly within Microsoft Word. This guide will show you how to do it. After receiving his Bachelor’s and Master’s degrees in Computer Science he spent several years working in IT management for small businesses. However, he now works full time writing content online and creating websites. His main writing topics include iPhones, Microsoft Office, Google Apps, Android, and Photoshop, but he has also written about many other tech topics as well. Read his full bio here.
You may opt out at any time. Read our Privacy Policy
