While an image in and of itself can be enough to grab your reader’s attention, you might want to start applying some effects ot make it really stand out. One such option in Microsoft Word can give the picture some depth. Our tutorial below will show you how ot use a drop shadow on a picture in Microsoft Word.
How to Apply an Image Drow Shadow in a Word Document
Our guide continues below with additional information on how ot add a drop shadow to a picture in Word 2010, including pictures of these steps. Adding an image to a Word 2010 document can make for a nice visual change from the typical black text on a white background that readers are used to. Additionally, images can often provide helpful information about a topic that you may not be able to accurately convey in words. But sometimes the simple act of adding a picture, with its’ default settings, may not be enough. Depending upon your needs for a document, there can be more to be gained if you can style the image a little bit to make it seem more professional. But the trick with doing this is to add to the image without taking away from the contents of the image. One way to do this is by adding a drop shadow to a picture in Word 2010. This effect gives the image some depth and makes it seem a little more finished than an image that does not include a drop shadow. Do you want to type in small capital letters? Find out how to use an all caps font in Word with our tutorial and learn about a setting that lets you do that.
How to Add a Shadow Around an Image in Word 2010 (Guide with Pictures)
If you have ever seen a picture on a document with a shadow around part of the image, then you have seen a drop shadow. This is a popular effect in image editing programs as well as word processing programs because it adds some depth and style to an image without requiring any actual image editing. Adding a drop shadow to an image in Word 2010 is actually a simple process, and you can do it with any image that you can insert into your documents.
Step 1: Open the document with the image to which you wish to add a drop shadow.
Step 2: Scroll to the page containing the image, then click it once to select it.
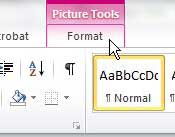
Step 3: Click the Picture Tools – Format tab at the top of the window.
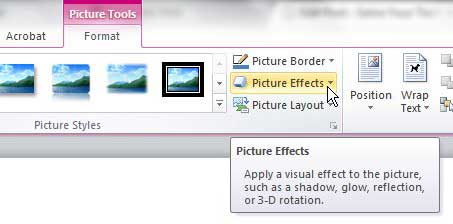
Note that this tab is not visible until the image in the document has been selected.
Step 4: Click the Picture Effects drop-down menu in the Picture Styles section of the ribbon at the top of the window.
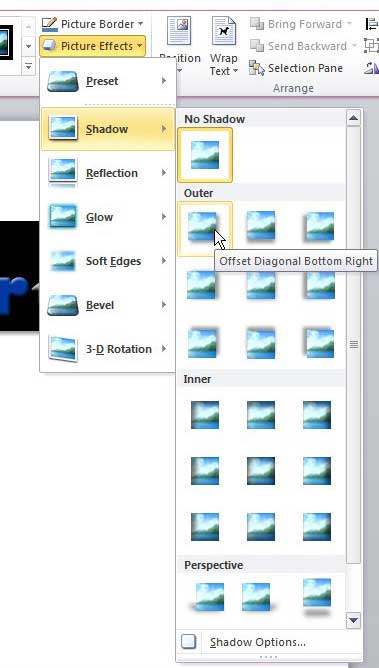
Step 5: Click the Shadow option, then choose the type of shadow that you want to apply to the image.
There are many options available, and you can hover over an option to see how your image will look with that shadow applied. Now that you know how to add a shadow to a picture in Microsoft Word you will be able to use this and some other helpful formatting options that can really improve the visual appearance of your images. If the best option you find is not exactly right for your needs, you can click the Shadow Options button at the bottom of the Shadow menu. You can use the options on the Shadow Options window to configure every aspect of the drop shadow until you are happy with the appearance. After receiving his Bachelor’s and Master’s degrees in Computer Science he spent several years working in IT management for small businesses. However, he now works full time writing content online and creating websites. His main writing topics include iPhones, Microsoft Office, Google Apps, Android, and Photoshop, but he has also written about many other tech topics as well. Read his full bio here.
You may opt out at any time. Read our Privacy Policy