If you need to add an outline to an excel text box then you can select the text box, click the Format tab, Click the Shape Outline button, then choose the desired border color. While it is customary to display data in Excel in the cells of the spreadsheet, situations can arise where you need to display your information in a way that will not affect the layout of the rest of your cells. An ideal solution to this is a text box, which can be customized independently of the rest of your data. You can even execute formulas in those text boxes if you wish. But text boxes have formatting that is separate from the other settings for your worksheet, and you may find that you have a text box that doesn’t have a border but needs one. Our guide below will show you how to add a border to a text box in your Excel 2013 worksheet. The steps below will assume that you already have a text box in your spreadsheet and that it does not have a border. If you are instead interested in displaying gridlines on your spreadsheet, you can click here.
How to Add a Border to a Text Box in Excel 2013
You can continue reading below for additional information on making text box outlines in Microsoft Excel, including pictures of these steps.
How to Border text Box Objects in Microsoft Excel (Guide with Pictures)
The steps in this article were performed in the Excel 2013 version of Microsoft Office, but will also work in most other versions of Excel as well.
Step 1: Open your file in Excel 2013.
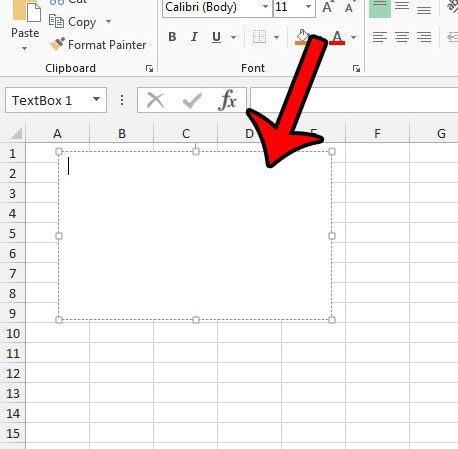
Step 2: Click the text box that you would like to have a border.
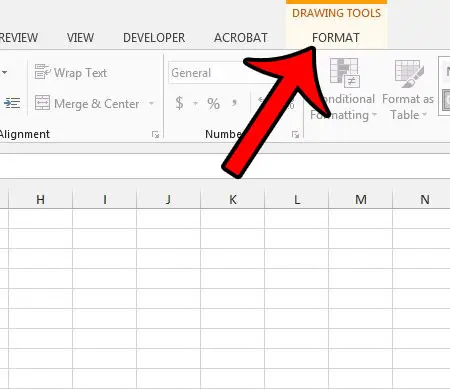
Step 3: Click the Format tab under Drawing Tools at the top of the window.
In newer versions of Microsoft Excel, it will say “Shape Format” instead of just “Format.”
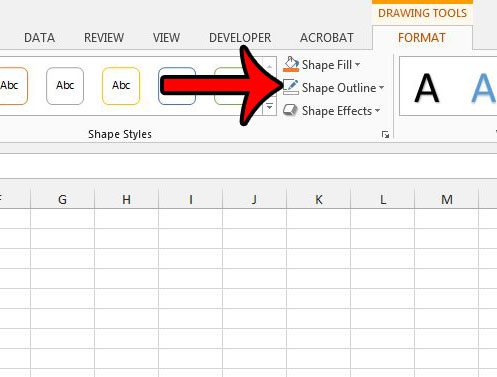
Step 4: Click the Shape Outline button in the Shape Styles section of the navigational ribbon.
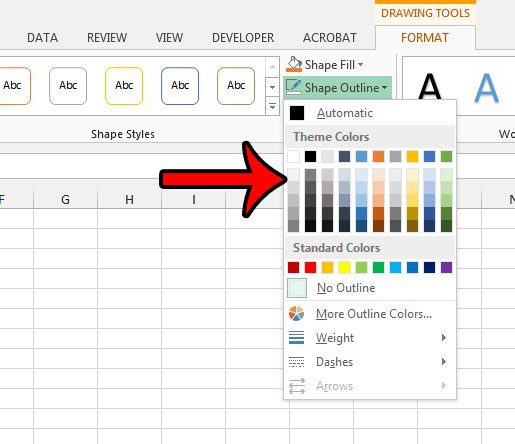
Step 5: Click the color that you would like to use for the border. note that you can return to this location if you would like to set the width or style of your border.
Our tutorial continues below with additional discussion on how to format Excel text boxes by adding borders.
How to Change Excel Text Box Formatting by Adding Borders
When you elect to outline a text box in your spreadsheet you are able to adjust the appearance of that outline in a number of ways. These include:
Theme colors – this is how you pick the outline color for the text boxNo outline – this is how you remove a border from a text box in ExcelMore Outline Colors – offers additional color selections beside those shown under “Theme Colors”Weight – adjust this to change the thickness of the Excel text box borderDashes – switch the border from a solid line to one with dashes
Note that a white border on a text box is different than selecting “No Outline.” If you choose the white border color and print on a color of paper other than white, or if you change the background color of your cells or worksheet then you will see the white border of the text box. If you don’t already have a text box in your spreadsheet then you won’t be able to see the Drawing Tools Format tab where the Shape Outline button is found. You can add a text box to Excel by selecting the Insert tab at the top of the window, clicking the Text button in the ribbon, then choosing the Text Box option and drawing it on the spreadsheet. You can use a similar method to perform format shape actions in other Microsoft Office applications, such as Microsoft Word or Microsoft Powerpoint. In fact, you can even copy and paste text boxes between a Microsoft Excel spreadsheet and a Microsoft Word document. Office will also copy any styles that you have applied to the text box, such as the border around the object. If you decide later that you do not like the appearance of the text box with the border, then you can simply remove the border from the text box instead.
Additional Sources
After receiving his Bachelor’s and Master’s degrees in Computer Science he spent several years working in IT management for small businesses. However, he now works full time writing content online and creating websites. His main writing topics include iPhones, Microsoft Office, Google Apps, Android, and Photoshop, but he has also written about many other tech topics as well. Read his full bio here.
You may opt out at any time. Read our Privacy Policy


