Pictures can be a great addition to many types of documents that you can create in Word 2013. But many pictures can seem to fade into the background of the document, or a picture might have a white background that doesn’t look quite right when placed upon a document with its own white background. Fortunately, Word provides you with the ability to add a border to a picture, which can provide a much-needed separation between the document body and the picture. Our guide below will show you how to put a border around a picture in your document, as well as how to specify the color, width, and style of that border.
How to Insert a Picture Border in Microsoft Word
Our guide continues below with more information on adding a border to a picture in Word 2013, including pictures of these steps.
How to Put a Border Around an Image in a Word 2013 Document (Guide with Pictures)
The steps in this guide will assume that you have a document containing a picture and that you want to add a border to that picture. You will be able to modify the color, width, and style of the border.
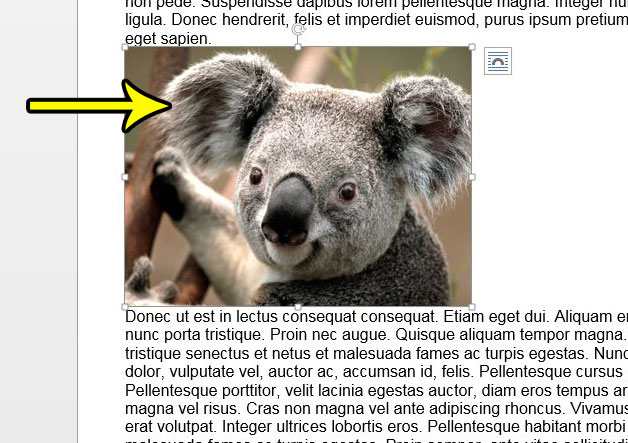
Step 1: Open the document containing the picture to which you wish to add a border.
Step 2: Click the picture to select it.
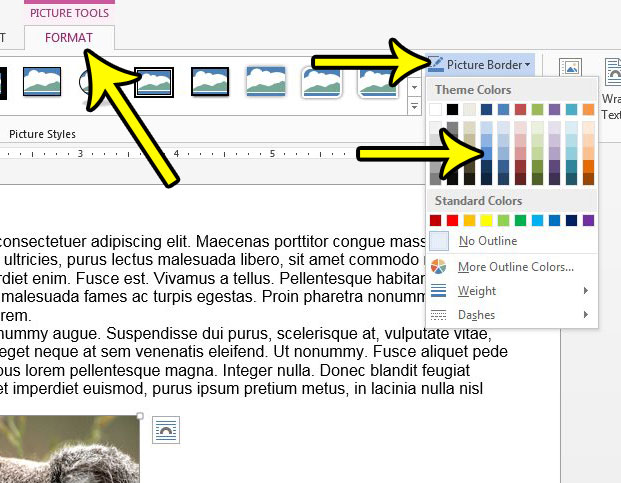
Step 3: Click the Format tab under Picture Tools at the top of the window, then click the Picture Border button and select a color for the border.
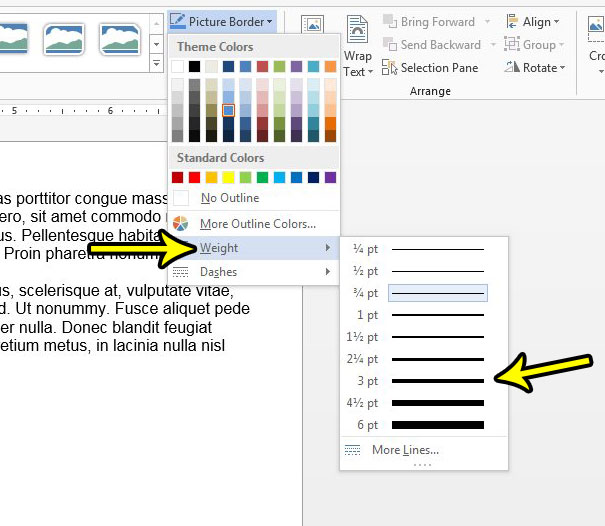
Step 4: Click the Picture Border button again, then click the Weight option and choose the desired border thickness.
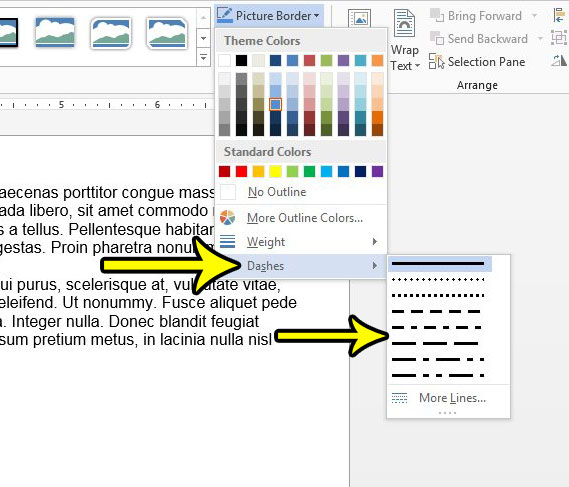
Step 5: Click the Picture Border button another time, click Dashes, then choose the desired style for the border.
If the line style that you want to use is not shown here then you can click the More Lines button to see other simple border or complex border options. Our tutorial continues below with more information on working with borders in Word 2013, including how to add a border to a document.
How to Access the Picture Format Tab in a Word Document
Typically there is a selection of tabs that appear at the top of the window in a blank document or existing document in Word 2013. These include things like Home, Insert, Design, Layout, etc. But some other tabs will only appear when you take specific actions. One of these specific tabs is the “Picture Format” tab. In order to make this appear so that you can access the options on it you will need to have a picture in your document, then click on it. Once the image is selected you will see the Picture Format tab at the top of the window.
How to Add Border in Word 2013
While the section above focuses on adding a border to a picture in your document, you may need to know how to put a border on Microsoft Word 2013 documents. The process to accomplish this is a little different, as it’s a setting that you find on the Design tab. The Page Background group where you find the Page Border button also has options for Watermark and Page Color settings which you can also use to customize the appearance of your document.
More Information on How to Add Border to Picture in Word 2013
You can skip the steps in this article for changing the weight and style of the border on your picture if the default option meets your needs. Many people that add picture borders in Word simply need to make the separation between the image and the rest of the document a bit more prominent, which the default border setting accomplishes. The Picture Styles group where you find the Picture Border button also includes options like Picture Effects and Picture Layout. You can use these options, as well as others found on the Picture Format tab if you need to modify your image in other ways, too. There are a lot of border color options on the color picker drop down menu, but you may not see the one that you need want. In this case you can click the More Outline Colors button and select a color that way. You can even click the Custom tab at the top of the Colors dialog box if you would like to enter a hex color for the border that you are creating. Another way that you can add a border to an image is with the Borders and Shading dialog box. When the picture is selected you can click the Home tab at the top of the window, then click the arrow to the right of the Borders button in the Paragraph group, then select the Borders and Shading option at the bottom of the menu. At the top of this menu are a Borders tab, Page Border tab, and Shading tab. You can use these options to customize the borders on your images, shape, or other selection. Word also gives you the ability to add borders to a paragraph in your document. Learn how to add a paragraph border in Word 2013 if you have a selection of text in your document that would look better with a border around it.
Additional Reading
He specializes in writing content about iPhones, Android devices, Microsoft Office, and many other popular applications and devices. Read his full bio here.


