The iPhone has a feature that is well-suited for managing these website blocks called Restrictions. Our tutorial below will show you how to enable Restrictions on an iPhone so that you can block a website on the device. The blocked website is locked behind a restrictions passcode, meaning only you will be able to unblock the website by entering that passcode and changing the setting.
Website Blocking on an iPhone 7
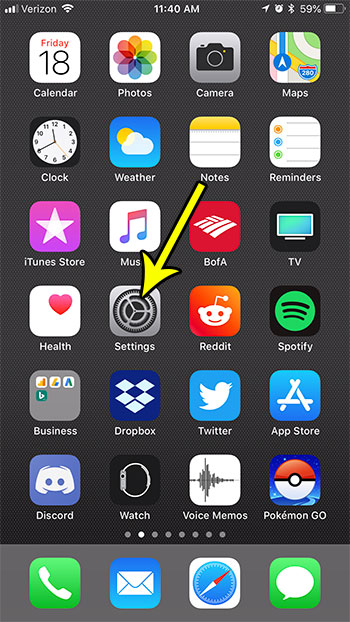
The steps in this article were performed on an iPhone 7 Plus, in iOS 11.3. The steps in this article are going to block visits to the website that you select from any Web browser that you use on the device. This means that third-party browsers, such as Chrome or Firefox, will not be able to visit the site, along with the default Safari browser. Step 1: Open the Settings menu.
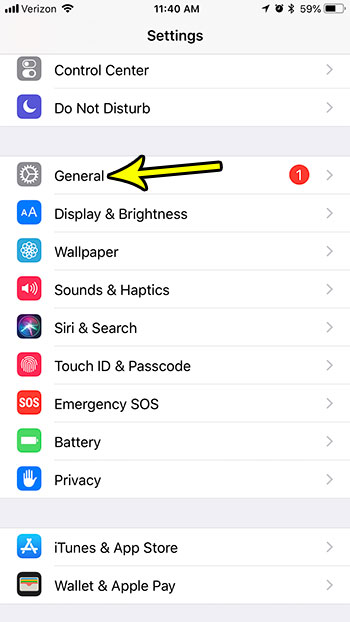
Step 2: Scroll down and choose the General option.
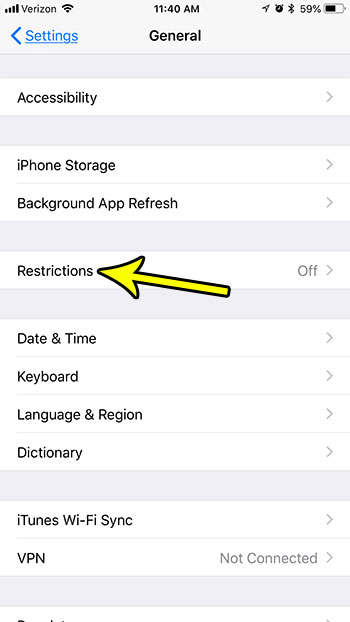
Step 3: Touch the Restrictions option.
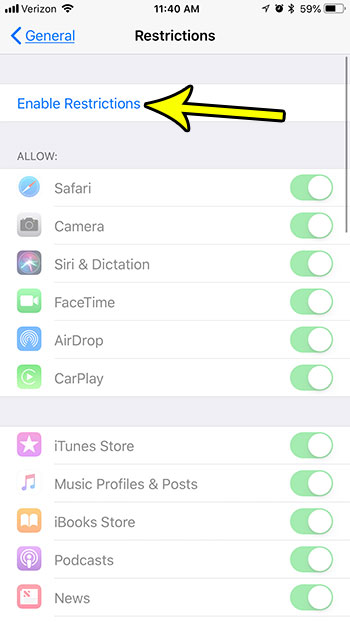
Step 4: Tap the Enable Restrictions button at the top of the screen.
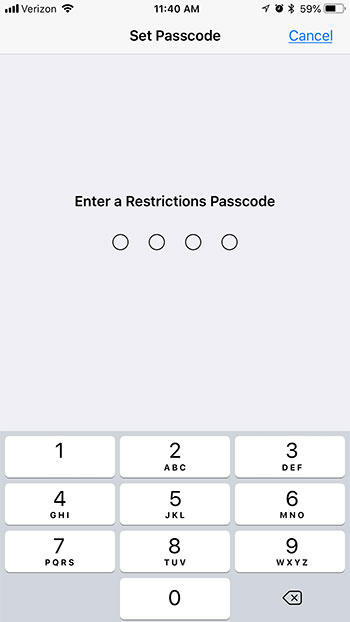
Step 5: Create a Restrictions passcode (should be different than your device passcode,) then re-enter the passcode to confirm it.
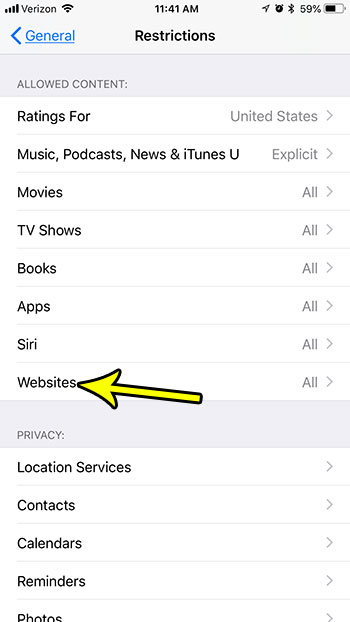
Step 6: Scroll down to the Allowed Content section of the menu, then select the Websites option.
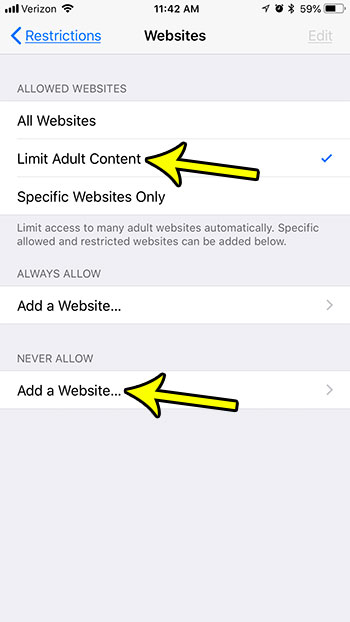
Step 7: Choose the Limit Adult Content option, then tap the Add a Website button under Never Allow.
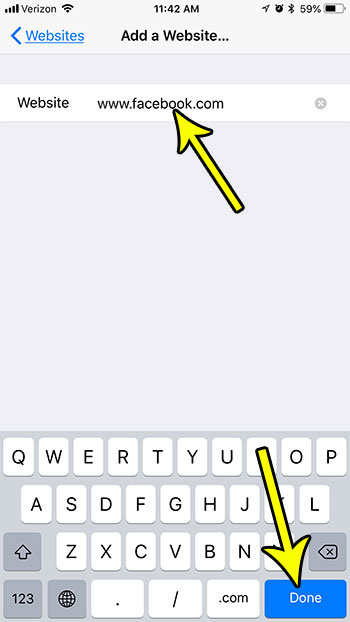
Step 8: Type the website that you wish to block, then tap the Done button at the bottom-right of the screen.
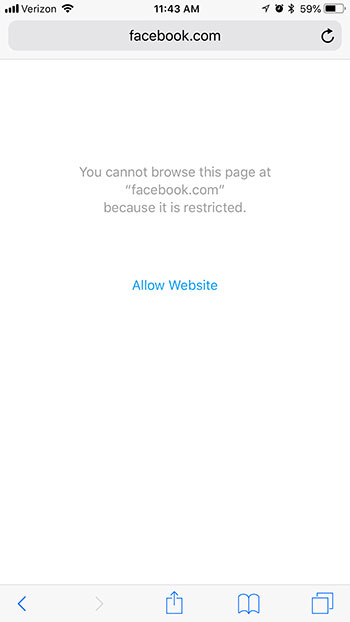
Now you can open a Web browser and type the address to try and go to it, then you will be met with the screen below, telling you that the site is restricted.
Restrictions on an iPhone can be very helpful for making a child’s phone safe, but they can occasionally get it the way. Find out how to turn off restrictions on an iPhone if you find that you need to let your child do something on their device that is currently not allowed. He specializes in writing content about iPhones, Android devices, Microsoft Office, and many other popular applications and devices. Read his full bio here.
