Manually Adjust Time and Date on Windows 11
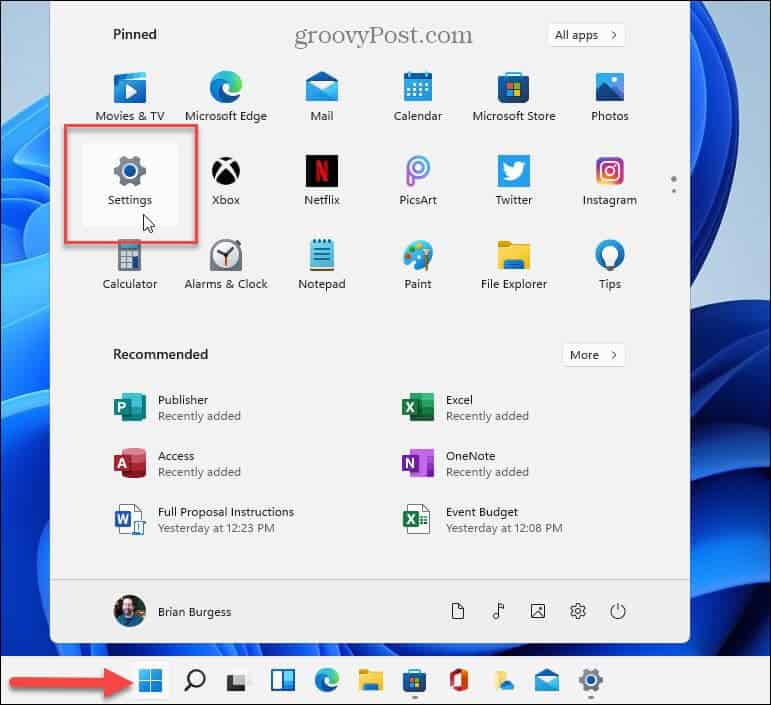
To get started, you need to click Start and then click Settings. Alternately, you can open Settings by using the keyboard shortcut Windows key + I.
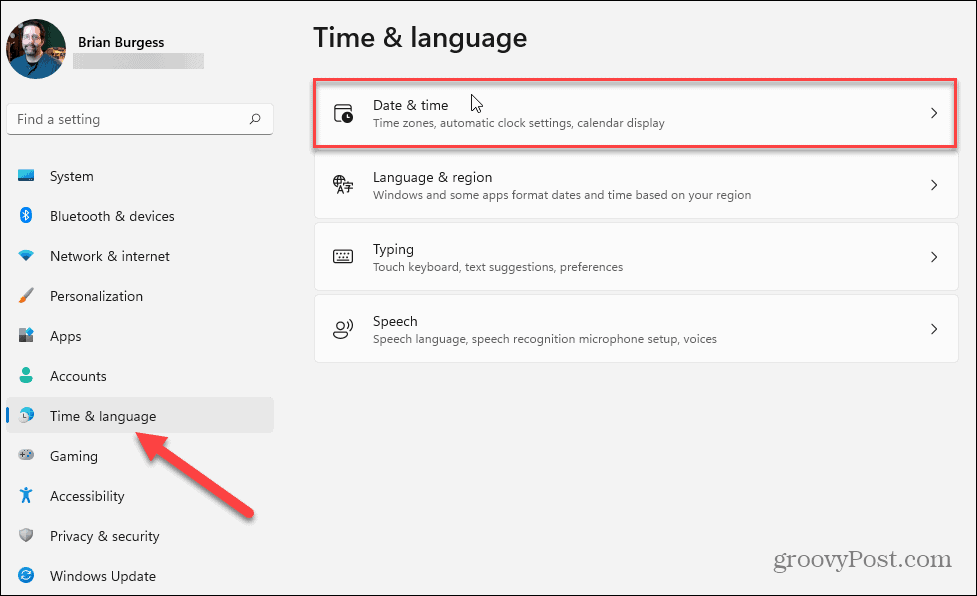
When the Settings menu opens up, click on Time & Language from the list on the left. Then on the right, click on the Date & Time option.
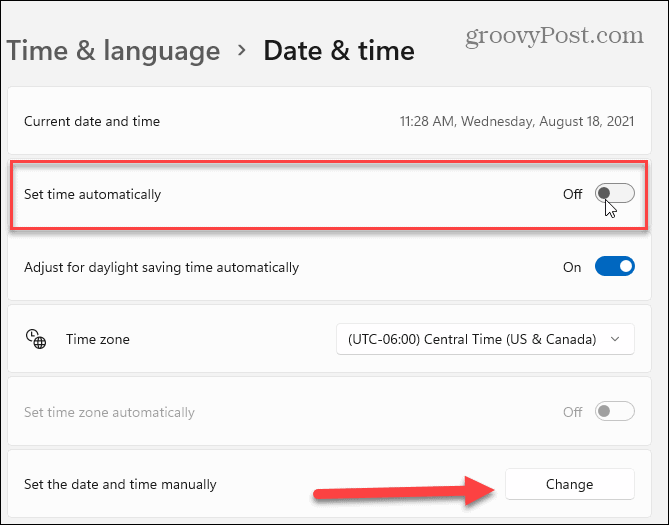
Now, on the Date & Time section, toggle the “Set time automatically” switch to the Off position. That will make the “Set the date and time manually” button not be grayed out. Click on the Change button.
After clicking the Change button, you will get a “Change date and time” window. From here, use the menu controls to get the time and date you want to set your computer to and click the Change button.
Make Windows Automatically Set Time and Date
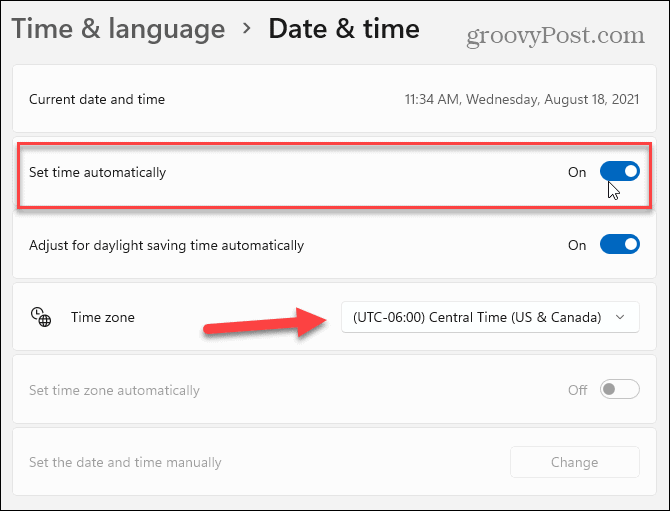
If you would rather have Windows get the time automatically, it’s easy to turn back on. Go to Start > Settings > Time & Language > Date & Time. Then turn the “Set Time Automatically” switch back on. Note that here you can also set the time zone for your region as well.
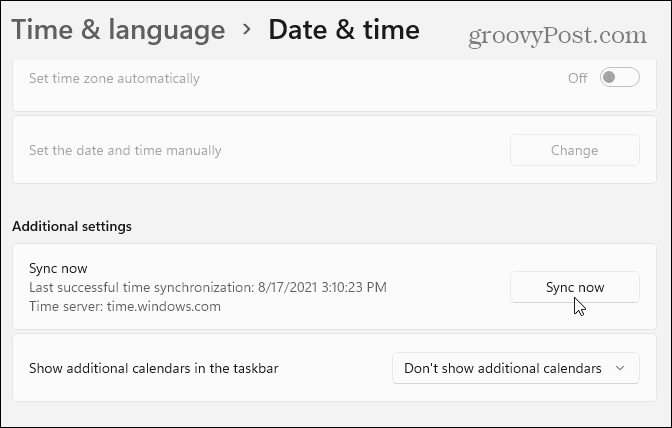
Finally, make sure to scroll down to the “Additional Settings” section. Underneath it, click the Sync Now button to make Windows 11 sync its time and date to match the Microsoft Network Time Protocol (NTP) servers. Closeout of Settings, and you should now be good to go.
It’s also worth mentioning that a faster way to get to time settings is to right-click the clock on the system tray and click Adjust Date & Time from the pop-up.
For more on configuring and managing your PC’s clock, read our articles on changing the time and date on Windows 10. Or read about adding extra clocks for different time zones on Windows 10. Also, take a look at how to sync the Windows 10 clock with Atomic Time. Comment Name * Email *
Δ Save my name and email and send me emails as new comments are made to this post.
![]()

