But if you would like to add additional actions to this toolbar, you are able to do so. Our tutorial below will show you where to find the menu that allows you to customize the buttons that appear in this toolbar. You can remove some of the existing options, as well as add some others that can make composing email a little easier.
Add or Remove Items from the Outlook.com Toolbar
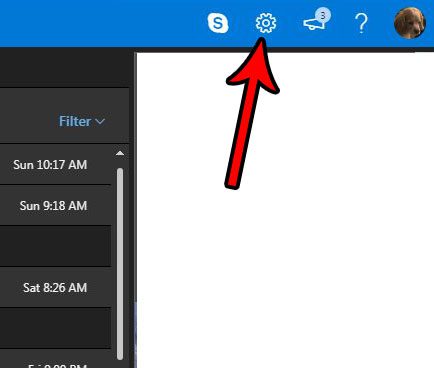
The steps in this article were performed in the desktop version of the Google Chrome Web browser, but will also work in other browsers like Firefox or Edge. Note that this is going to customize the toolbar that you see when you are composing an email in the browser version of Outlook.com. Step 1: Sign into your email account at https://www.outlook.com. Step 2: Click the gear icon at the top-right corner of the window.
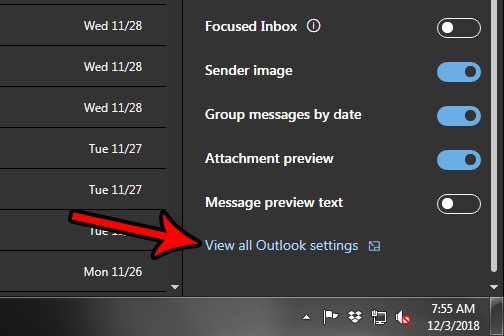
Step 3: Choose the View all Outlook settings option at the bottom of the column on the right side of the window.
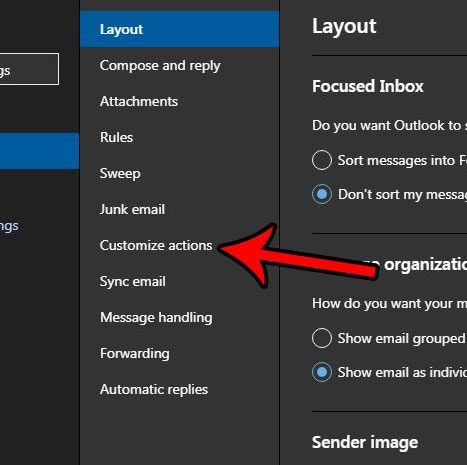
Step 4: Select the Customize Actions option in the center column of the menu.
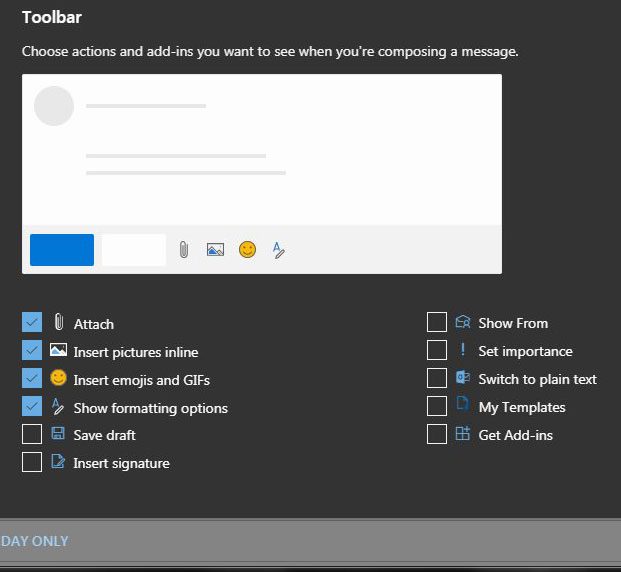
Step 5: Scroll down to the Toolbar section of the menu then add and remove items that you would like to have in the toolbar. Once you’re done, click the Save button at the top-right corner of the menu.
Would you like your Outlook.com interface to look like the one shown in the images above? This article will show you how to enable dark mode inn Outlook.com if you prefer the way that this looks to the default color scheme. After receiving his Bachelor’s and Master’s degrees in Computer Science he spent several years working in IT management for small businesses. However, he now works full time writing content online and creating websites. His main writing topics include iPhones, Microsoft Office, Google Apps, Android, and Photoshop, but he has also written about many other tech topics as well. Read his full bio here.
You may opt out at any time. Read our Privacy Policy


