We have previously discussed how to delete all of the recent documents in Word 2010, but that might not be a favorable option either. Fortunately there is another way to remove items from this list, and you can do so on a per-document basis. Our tutorial below will guide you through the steps that you need to follow in order to remove individual documents from the Recent tab within the program. This will let you keep the documents you want on this list, and remove the ones that you do not want. Our how to delete Word documents guide provides you with another option for getting rid of Word files that you don’t need anymore.
Removing One Document from the Recent Documents List in Word 2010
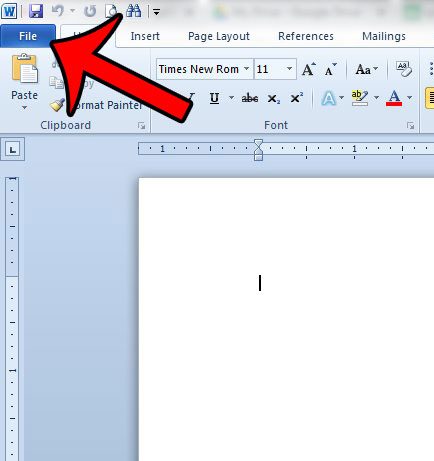
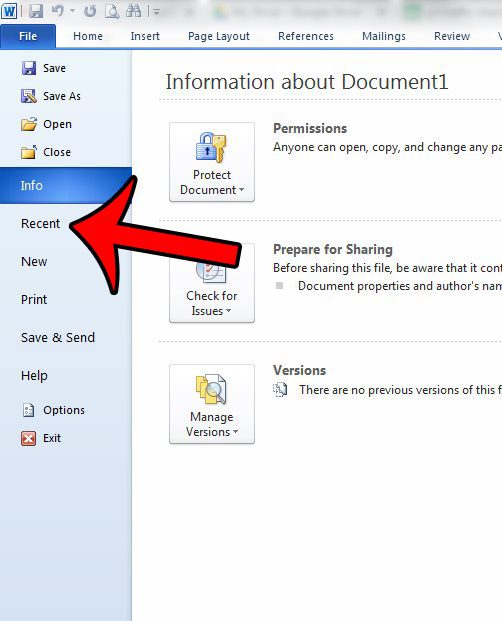
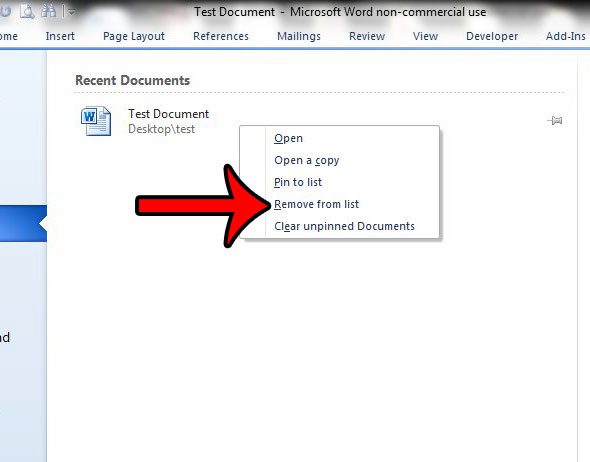
The steps in this article were performed in Microsoft Word 2010, but the same method will also work for Word 2013. If you would prefer to delete all of the documents from your Recent Documents list, instead of deleting them individually, then you can follow the steps in this article. Step 1: Open Microsoft Word 2010. Step 2: Click the File tab at the top-left corner of the window. Step 3: Click the Recent option in the column at the left side of the window. Step 4: Right-click the document that you want to remove from the list, then click the Remove from list option. Do you need to create a PDF document, but are unsure about which programs can help? Fortunately Microsoft Word 2010 can create PDF documents with the steps in this guide. This is a great way to share your documents with people that might not have Microsoft Word on their computer, or if you need to post a file directly to a website. After receiving his Bachelor’s and Master’s degrees in Computer Science he spent several years working in IT management for small businesses. However, he now works full time writing content online and creating websites. His main writing topics include iPhones, Microsoft Office, Google Apps, Android, and Photoshop, but he has also written about many other tech topics as well. Read his full bio here.


