You may find that Powerpoint 2013 is ending on a black screen. While this can provide a clear message that the presentation is over, you may have designed your slideshow to include important information on the last screen so that your audience could reference it. Fortunately you can change the Powerpoint settings so that it ends on your last slide rather than this black screen. If you’re viewing your presentation on your phone, then you may want to check out our guide on how to make your screen stay on longer so that it stops locking.
How to Finish On Your Last Slide in Powerpoint 2013
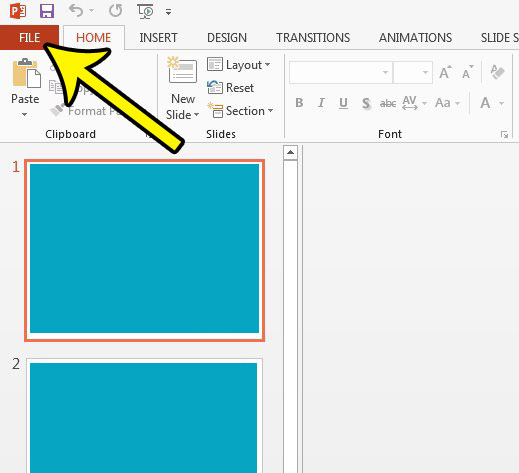
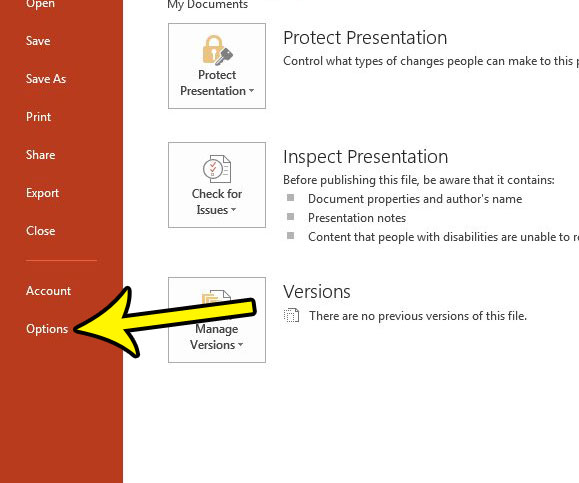
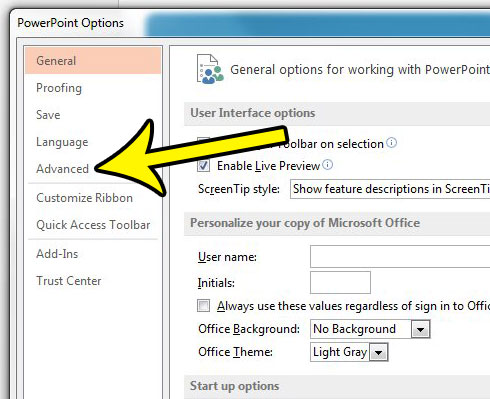
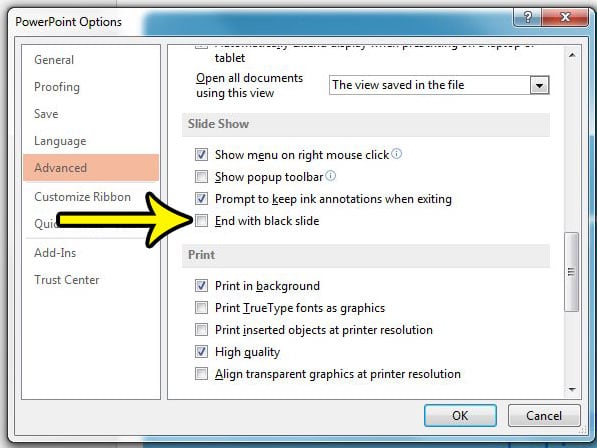
The steps in this article were performed in Microsoft Powerpoint 2013. By changing this setting you will instruct Powerpoint to end your slideshow once it reaches the last slide. This change is applied to the entire Powerpoint program, so it will affect any presentation that you play from this computer. Step 1: Open Powerpoint 2013. Step 2: Click the File tab at the top-left corner of the screen. Step 2: Click the Options button at the bottom of the column on the left side of the window. Step 3: Click the Advanced tab at the left side of the Powerpoint Options window. Step 4: Scroll down to the Slide Show section of the menu, then click the box to the left of End with black slide to remove the check mark. You can then click the OK button at the bottom of the window to apply your changes and close the window. Are the notes for your slideshow an important component of the presentation, so you would like to include them when you print? Learn how to print Powerpoint notes along with the slides. Changing the formatting of an entire slideshow can be complicated, but what if you only need to adds a small symbol to one of your slides? This guide will show you how to add a check mark in Powerpoint if you’ve been struggling to find a way to do so. He specializes in writing content about iPhones, Android devices, Microsoft Office, and many other popular applications and devices. Read his full bio here.


