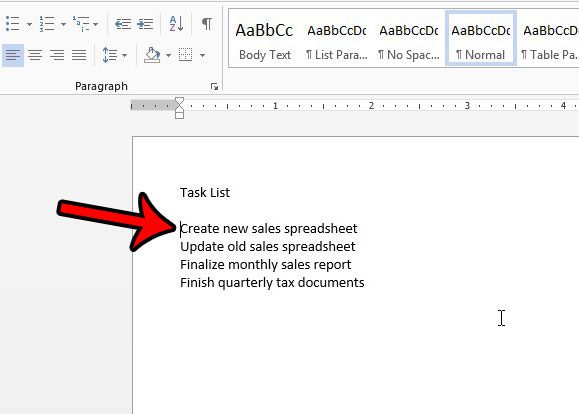
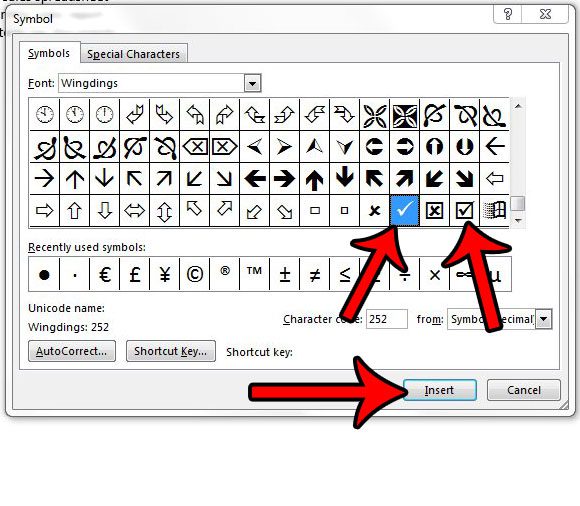
One of the more commonly-needed symbols is a check mark, such as when you are including a checklist in your document. Our guide below will show you how to insert a check mark symbol in Word using a “symbols” menu in the application.
How to Make a Check Mark in Word 2013
Our guide continues below with additional information on putting a check mark symbol in Word, including pictures for these steps. Related Topic: Word has a bunch of other symbols you can add as well. Read our square root symbol on keyboard article for more information. Microsoft Word 2013 has a rather large library of symbols like the square root symbol that you can insert into a document, and the check mark is one of the symbols that is available. The check mark symbol is part of the Wingdings font, and behaves similarly to any other letter or number that you might include in your document. Since the check mark is a normal character as far as Word is concerned you can customize it in a variety of ways, making it more flexible than adding a picture of a check mark to your document instead. Our tutorial will show you how to insert a checkmark into a Word document, as well as how to change its appearance, or copy and paste the check mark into a different location within the document. If you would like to add check marks to your slideshows too, then our check mark Powerpoint article can show you how.
How to Add a Check Mark to a Document in Word 2013 (Guide with Pictures)
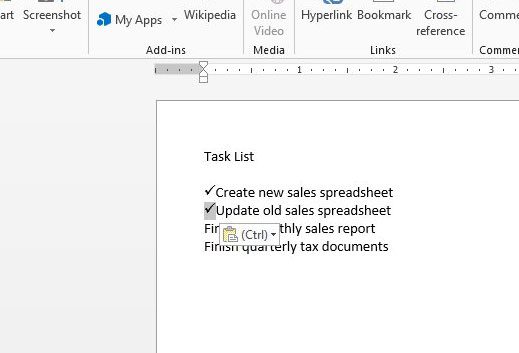
The steps in this article will show you how to locate and insert a check mark symbol into a document. The check mark is a symbol that is included with Word 2013 by default, so any computer that has a copy of Microsoft Word 2013 installed should be able to follow these steps to put a check mark into a document. Once you have finished adding check marks to your document, you can click the Close button on the Symbol window. Note that there is also a symbol of a check mark inside a box, if you would prefer to use that one. Note that you can select a check mark in your document and copy and paste it the same way that you would copy or paste any other text.
More Information on How to Put a Check Mark in Word
If you select the check mark in your document, you can make it smaller or larger by adjusting the font size. You can also adjust the color, too. If you want to make the check mark really big, but the 72 pt font size isn’t enough you can choose to manually enter a font size instead. Learn more about bigger font sizes here. Instead of using the copy and paste commands on the right-click menu or in the ribbon, you can also copy a selection by pressing Ctrl + C on your keyboard, and paste by pressing Ctrl + V on your keyboard. You can use the same method if you need to insert a check mark into an Excel spreadsheet as well.
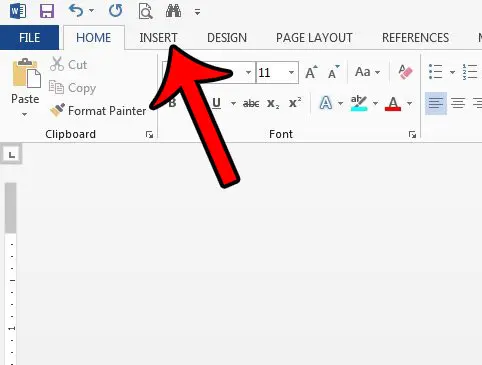
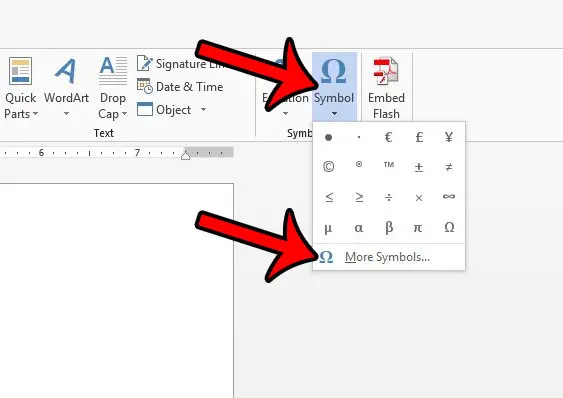
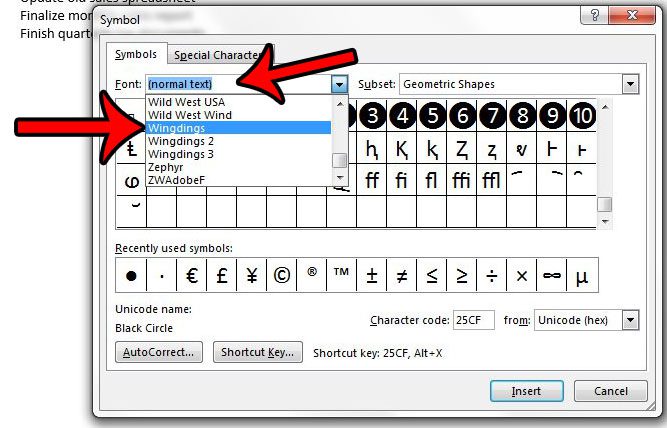
Learn how to remove formatting from a Word document if you have copied and pasted information into your document, and manually changing each formatting option seems impractical. Click Insert > Symbol > More Symbols > choose the Wingding font, then scroll down and select the checkmark. You can then click the Shortcut key button, which will open a Customize Keyboard dialog box. Here you can click inside the Press new shortcut key field and press the keys on your keyboard that you would like to assign as the “insert check mark” keyboard shortcut. Once you have created it, simply click the Assign button. After you click Assign you should be able to go into your document and press Alt or press Ctrl and whatever combination of keys you specified for your shortcut. Note that you may have more luck using a combination of keys that involves the Alt key, as Microsoft Office has a lot of existing character code keyboard shortcuts already, so it’s tough to pick an empty option. This should open a new window where the Symbols tab is selected. You can then choose the Font dropdown menu and select the Wingdings font. You can also select the Segoe UI Symbol font as an alternate symbols option, as that font also offers a large selection of symbols that you can add to your document, including its own checkmark. After receiving his Bachelor’s and Master’s degrees in Computer Science he spent several years working in IT management for small businesses. However, he now works full time writing content online and creating websites. His main writing topics include iPhones, Microsoft Office, Google Apps, Android, and Photoshop, but he has also written about many other tech topics as well. Read his full bio here.
You may opt out at any time. Read our Privacy Policy
