Printing Slides with Frames in Powerpoint 2010
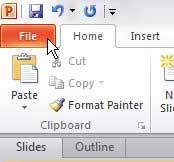
Although it may seem that way because of how you design and edit your slides, Powerpoint slides do not technically have borders or frames. The default setting when printing multiple slides per page will include a frame around each slide, but if you have inadvertently changed this setting at some point, or if you are trying to put a frame around pages with only one slide, then that is an option you can configure yourself. Step 1: Open the slideshow in Powerpoint 2010 to which you want to add frames when printing. Step 2: Click the File tab at the top-left corner of the window.
Step 3: Click Print at the left side of the window.
Step 4: Click the Full-page Slides drop-down menu at the center of the window, then click the Frame Slides option.
Note that this is the menu that you will use to configure the number of slides that are printed on each page in Powerpoint. Step 5: Once you have configured all of the settings that you need for your printed Powerpoint presentation, click the Print button at the top of the window. After receiving his Bachelor’s and Master’s degrees in Computer Science he spent several years working in IT management for small businesses. However, he now works full time writing content online and creating websites. His main writing topics include iPhones, Microsoft Office, Google Apps, Android, and Photoshop, but he has also written about many other tech topics as well. Read his full bio here.
You may opt out at any time. Read our Privacy Policy