If you need to take an inventory of something in your home or place of employment, or if you need an effective way to record pieces of information, then a table or grid is a great solution. One option for creating that grid is to draw it by hand, but that can be tedious and, depending on your artistic skill level, might not even be very helpful. Another option is to create a blank grid in Excel 2013 and print it out. But you may have found that it isn’t easy to print blank cells from Excel. Fortunately you can use a setting called the Print Area to achieve the desired result.
How to Print Empty Cells in Excel
Our article continues below with additional information on how to print a blank spreadsheet in Excel, including pictures of these steps.
How to Print Blank Cells in Excel 2013 by Setting a Print Area (Guide with Pictures)
The steps in this article are going to show you how to select and set a print area. This provides you with control over which parts of a spreadsheet print. This can be used not only for printing blank cells, but if you have a very large spreadsheet and only want to print part of it.
Step 1: Open a new Excel spreadsheet.
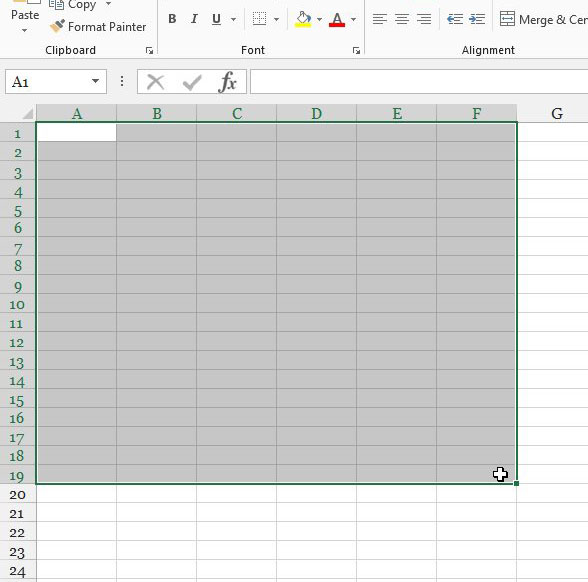
Step 2: Select the cells that you would like to print.
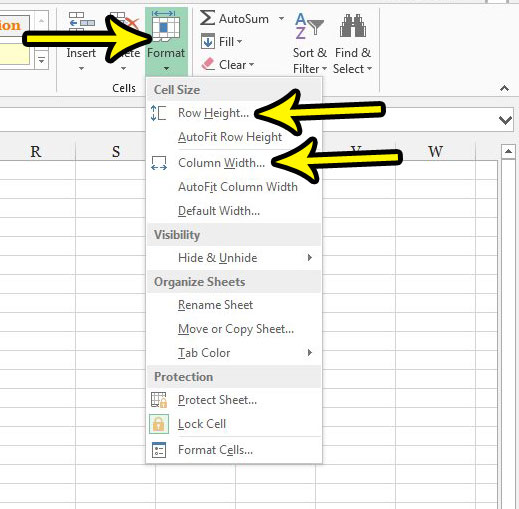
Step 2b (optional): Click the Format button in the Cells section of the ribbon, then select the Row Height of Column Width option. Enter a value into that field to set the height or width of the selected rows or columns, then click OK.
While not technically necessary, if you are printing out a blank table because you are going to be writing in it, then it can be beneficial if the cells are a little bigger.
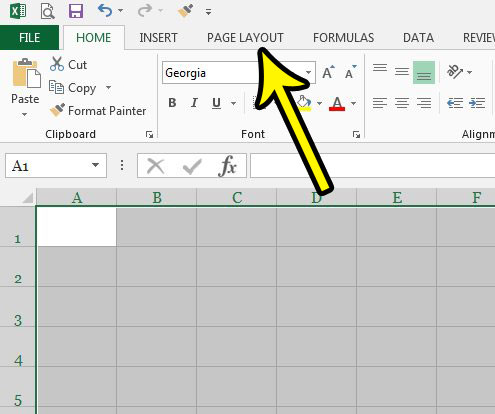
Step 3: Click the Page Layout tab at the top of the window.
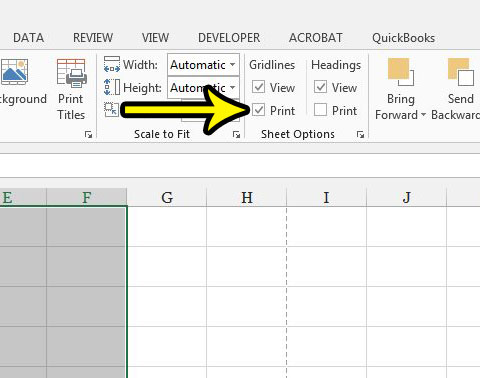
Step 4: Check the box to the left of Print under Gridlines in the Sheet Options section of the ribbon.
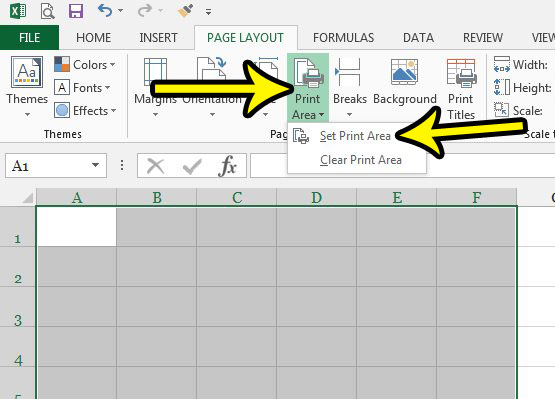
Step 5: Click the Print Area button in the Page Setup section of the ribbon, then select the Set Print Area option.
You can then go to the Print menu to see a preview of what your printed grid is going to look like. If you need to adjust other things about the way your spreadsheets are printing, then our Excel print guide can be really helpful. There are many ways that you can modify a printed worksheet to suit your specific project’s needs.
Changing Options on the Page Setup Dialog Box
One other option that you may want to consider when you need to print a blank spreadsheet in Excel is to open the Page Setup dialog box. You can do this by selecting the Page Layout tab at the top of the window, then clicking the small Page Setup button at the bottom-right of the Page Setup section in the ribbon. This window includes tabs for Page, Margins, Header/Footer, and Sheet. If you choose the Sheet tab you are going to see a handful of options for customizing how to data you want to print is going to look. These include options like how to print gridlines, repeating rows at the top of the page or columns at the left side of the page, as well as some other settings. If you click the Page tab you can adjust the page orientation, as well as the scaling options. But if your biggest concern is simply learning how to print a blank spreadsheet is Excel 2013 then the most important factors are to set the print area and enable the “Print Gridlines” option from the Page Layout tab. This will let you achieve your goal to print empty cells in an Excel spreadsheet.
Additional Reading
He specializes in writing content about iPhones, Android devices, Microsoft Office, and many other popular applications and devices. Read his full bio here.
