Record Your Webcam with VLC
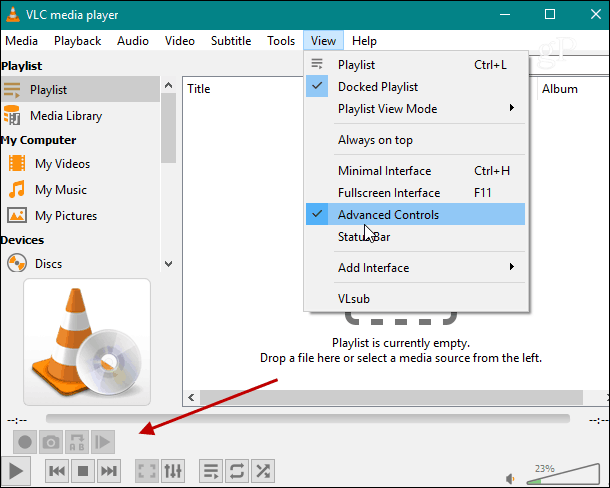
As a first step, I suggest you update the firmware on your Logitech webcam. Once that’s completed, launch VLC and go to the View tab and check Advanced Controls. That will put an extra toolbar with a record button to the lower-left corner of the app.
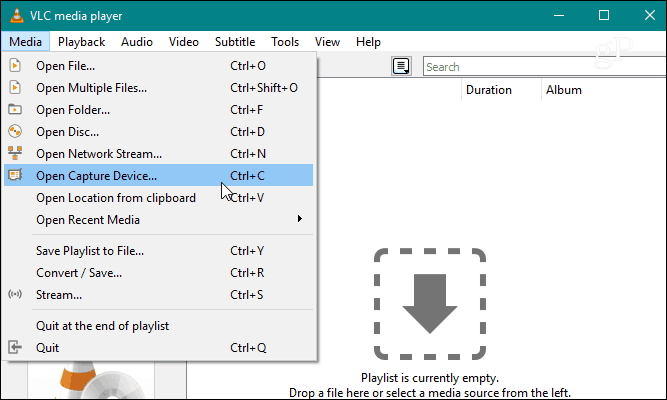
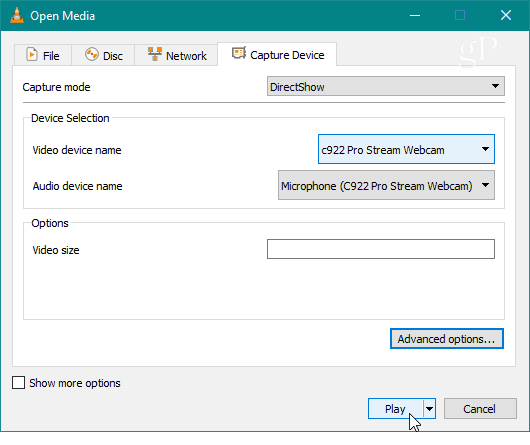
Next, go to Media > Open Capture Device.
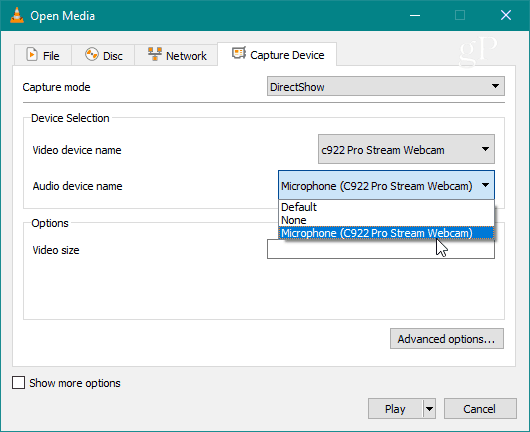
Now, keep Capture mode as “DirectShow” and choose your video camera and audio input device from the drop-down menu. In my example, I’m using a Logitech C922 for both video and audio devices. Depending on your setup, you’ll have different audio and video devices; choose the correct ones accordingly.
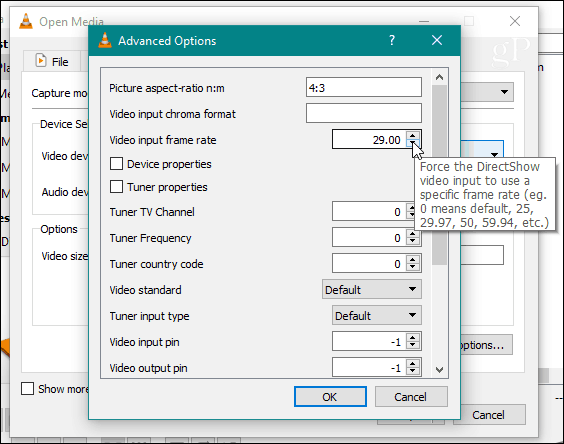
Another thing you might want to do here is to select the Advanced Options button and plug in a specific framerate for the video. Somewhere around 30fps will usually do a good job and keep the video file size down. You might need to experiment with this a couple of times to get the quality of video you want.
Once you have your audio and video input devices selected and tuned the frame rate, head down and click the Play button.
You will then see yourself or whatever you have the camera pointed at in the main window. To start recording, hit the Record button on the toolbar you added earlier.
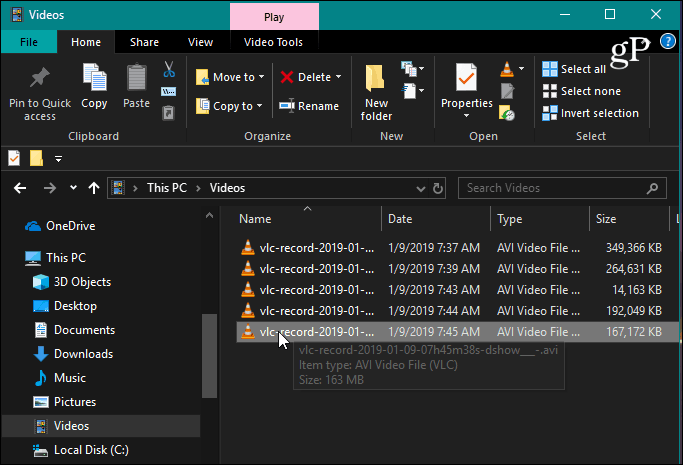
To stop recording, hit the Record button again or the Stop button to completely close out the recording session. You will find your recordings in your local Videos folder on your PC saved as AVI files.
It’s also worth noting that if you plan on recording your voice, you’ll probably want to wear a headset or manage your audio output device. Otherwise, you will hear the echo of your voice through the external speakers. This process is similar to recording your desktop, but you are choosing a different media input device. And, if you need your recordings in another format, you can use VLC to convert videos, too.
![]()
