Fortunately Excel 2013 has a built-in tool that allows you to create and apply a password to your entire Excel file. Once you have completed the steps in this article to require a password to view a workbook in Excel, the file that you have chosen to protect will not be accessible to anyone that does not have the password.
How to Password Protect a File in Excel 2013
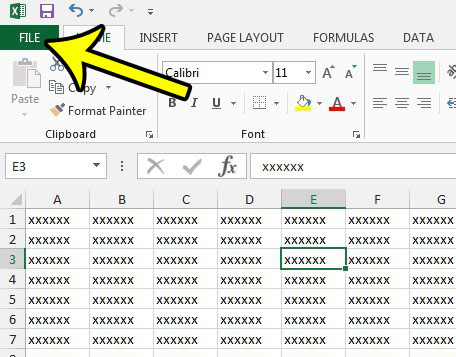
The steps below were performed in Microsoft Excel 2013. The result of completing these steps will be an Excel workbook that requires a password before it can be used. If you choose to share this workbook with another person, you will need to provide them with the password before they will be able to open, view, or edit the contents of your spreadsheet. Step 1: Open your Excel file in Excel 2013. Step 2: Click the File tab at the top-left corner of the window.
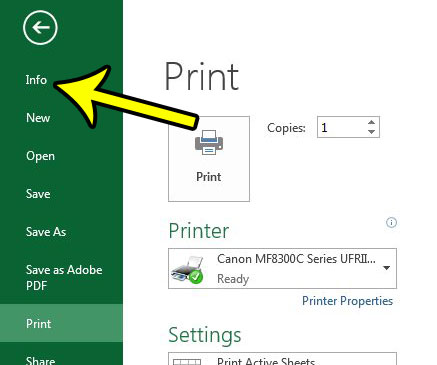
Step 3: Click the Info tab in the left column.
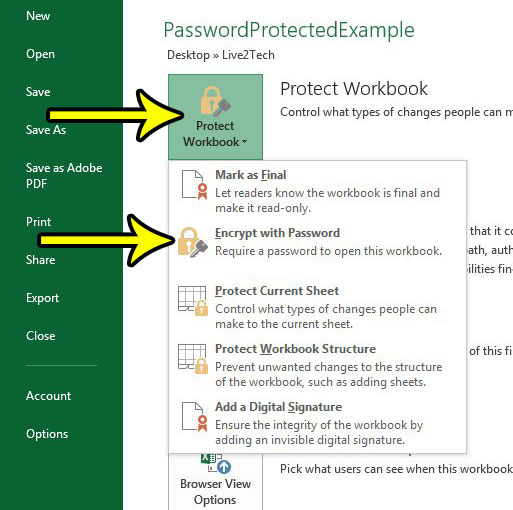
Step 4: Click the Protect Workbook button, then click the Encrypt with Password option.
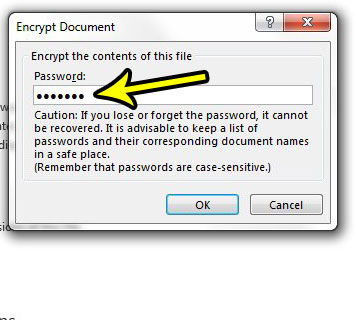
Step 5: Type the password that you wish to use into the Password field, then click the OK button. As noted in this window, there is no way to recover this password if you forget it, so make sure that it is something you will remember, or store a copy of the password somewhere safe.
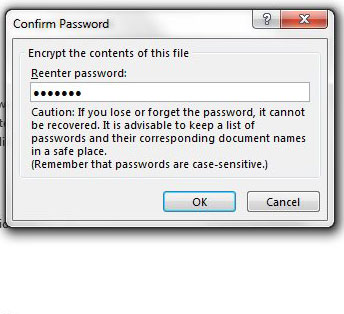
Step 6: Re-enter the password to confirm it, then click the OK button.
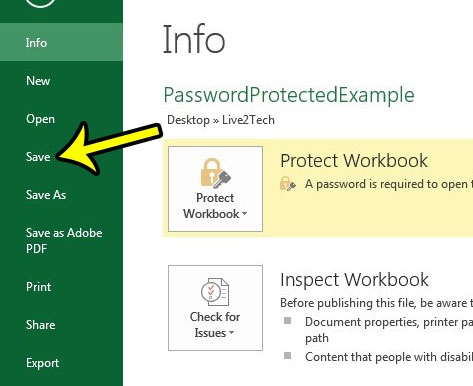
Step 7: Click the Save button to apply your changes. You can then close the file.
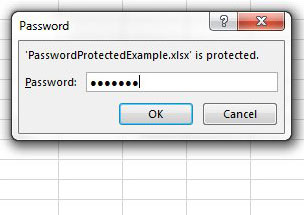
The next time you open the file, you will be greeted with a pop-up window like the one shown below. You will need to enter your password and click the OK button to gain access to the workbook.
Are you having trouble getting your Excel file to print correctly? Checkout our Excel 2013 printing guide and learn about many of the options available in the program to help you print your spreadsheets more efficiently. He specializes in writing content about iPhones, Android devices, Microsoft Office, and many other popular applications and devices. Read his full bio here.
