How Do I Sync Files to My iPad?
If you have just opened your new iPad, or if you have not yet downloaded and installed iTunes to your PC, you can do so from this link. Simply click the blue Download Now button at the left side of the window, then save the file to your computer. Once the file has finished downloading, you can double-click it to begin the installation, then follow the on-screen prompts to complete the installation process. iTunes should launch once the installation has finished but, if it does not, you can double-click the icon that it created on your Desktop. At the top of this window is a File link that you can click to begin adding files to your library. Click the Add file to library or Add folder to library option to browse to a file or folder, respectively, containing files that you want to sync with your iPad.
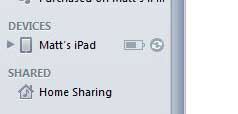
iTunes will then proceed with importing your files into your library. Note that the files shown in your library are the files that will be synced with your iPad. If a file did not import from a folder that you selected, then it is likely not compatible with iTunes and will not be synced with your iPad. Once all of your files have been added to the library, you can connect your iPad to your computer using the USB cable that was included with the iPad. The first time you connect the iPad you will need to do some basic setup, such as registering the device and either creating or adding an Apple ID to the device. Simply follow the prompts and instructions on screen until the setup has completed. Once the iPad is connected and registered, click your iPad under Devices in the column at the left side of the window.
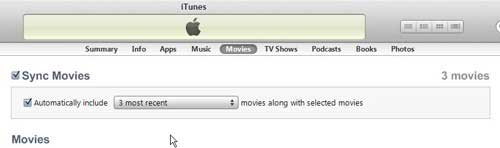
This will change the display at the center of the window, and there will be a tab at the top of this section for each type of file that you can sync with your device. Click the tab for each type of file to choose the sync settings for those files. For example, in the image below, I am configuring the Movies tab. Check the box to the left of Sync Movies to include these files when you sync to your iPad, then click the drop-down menu to specify how many movies you should sync to your device.
Once you have chosen your preferred settings on each tab, click the Apply button at the bottom-right corner of the window to begin syncing your device.
How to Sync Files Wirelessly from Computer to iPad
Now that your iPad is properly configured with iTunes on your computer, you can take advantage of the wireless syncing feature that was recently added to the iOS software on your iPad. This feature requires your computer and iPad to both be connected to the same wireless network. Once you have confirmed that both devices are in fact on the same network, you can begin the process below to perform a wireless sync. Connect the iPad to your computer, then wait for iTunes to launch. Choose your iPad under the Devices section, check the option to allow the iPad to sync wirelessly, then click the Apply button. Disconnect your iPad from the computer, then connect the iPad to a wall socket. Once the iPad recognizes your iTunes library on your computer, it will begin the wireless sync. To learn more about configuring the wireless sync on your iPad, you can read here. After receiving his Bachelor’s and Master’s degrees in Computer Science he spent several years working in IT management for small businesses. However, he now works full time writing content online and creating websites. His main writing topics include iPhones, Microsoft Office, Google Apps, Android, and Photoshop, but he has also written about many other tech topics as well. Read his full bio here.
You may opt out at any time. Read our Privacy Policy